How to Transfer Files Wirelessly between Your Laptops
Disclosure: This post may contain affiliate links. If you purchase through these links, we may earn a small commission at no extra cost to you.
Many people want to know how to transfer files from one laptop to another wirelessly. This guide will show you the various methods and applications you can use to achieve this. When you know how to transfer files wirelessly, you can avoid using a flash drive to make the file transfer between two laptops.
The first thing is to connect both of the laptops to your Wi-Fi network. It should just be a matter of the laptops automatically detecting the wireless router and then entering the correct password for a connection. Once the two machines are connected to the same Wi-Fi, you have many different options for file transfer.
How to Transfer Files Wirelessly
1. Using Wi-Fi
If you have set up a local area network and the two laptops are connected to this, you can share a specific folder and access it for the other laptop. You need to open Windows Explorer and then find the file or folder that you want to share.
Right-click on the file or folder and select “Give access to” and then “Specific people”. A new window will appear where you can select the other laptop username on your network. If you need to change the privileges so that the other laptop user can copy the file(s) then you can do that here.
Now you need to click on the “Share” button so that the other laptop can access the file(s). It is quite a complicated process. If you are not experienced in setting up local area networks, we recommend using one of the other methods below to transfer files to another laptop.
2. Nearby Sharing
If both laptops are using Windows 10 that is updated to version 1803 or higher, you can use the “Nearby Sharing” feature to transfer files quickly between the two laptops. Basically, you can perform file transfers with Nearby Sharing using either Wi-Fi or Bluetooth and it is not just for laptops. You can also transfer a file between a laptop and a desktop computer, for example.
For Nearby Sharing to work, both of the laptops need to have it enabled. Open up the System window from your windows settings menu and choose the “Shared experiences” option. Depending on your version of Windows 10 you will either see “Nearby Sharing” as an option to turn on or you need to find the “Share across devices” section.
Whichever one of these you see, you need to choose the option of “Everyone nearby”. It will enable the laptops to share and transfer files between them. The other option is “My devices only”. This requires that both laptops have a Microsoft account associated with them.
When one of the laptops receives a file from the other using Nearby Sharing, it will be stored in their Downloads folder. You have the option to change this to another folder location if you want to. Now it is time to start to share files between the two laptops.
You need to open File Explorer on the laptop that is going to share the file or folder. Right-click on it and then choose the “Share” option. Here you will see other devices, and you need to select the other laptop. As soon as you do this, the other laptop will receive a notification to accept the file transfer (or decline it).
You can only use nearby Sharing if the two laptops are running Windows 10 and they are both at version 1803 or higher. If the laptops are running different Windows versions, you can try some of the applications below to transfer files between the two machines wirelessly.
3. SHAREit
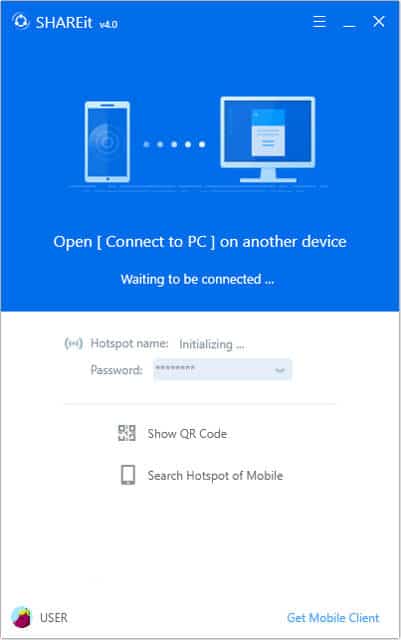
SHAREit is a free application that you can use to transfer files between two laptops wirelessly. It is compatible with Windows 7, 8, and 10. You need to download the application on both of the laptops and you can get the application here. The file size is about 18 MB.
After downloading and installing SHAREit on both laptops, you will need to open the application on both machines. On one of the laptops, access the menu in SHAREit via the 3 horizontal bars icon and then select “Connect to PC”. It will make the application search for the other laptop that is connected to the same Wi-Fi network.
Once you see the other laptop, you need to click on it to create a connection in SHAREit. The second laptop will receive a notification requesting that they accept the connection. Click on the “Accept” button on the second laptop.
When you want to transfer a file from one laptop to another, it is simply a matter of dragging and dropping it into the SHAREit interface. Alternatively, you can select a specific file on one of the laptops and then click on the “Open” button. The file transfer process will begin immediately.
After you have finished transferring the files between the two laptops you will need to click on the “Disconnect” button to prevent any further transfers. You should now see an icon for “File received” and when you click on this it will open the relevant folder that contains the transferred files. You can also access File received through the menu.
4. Feem
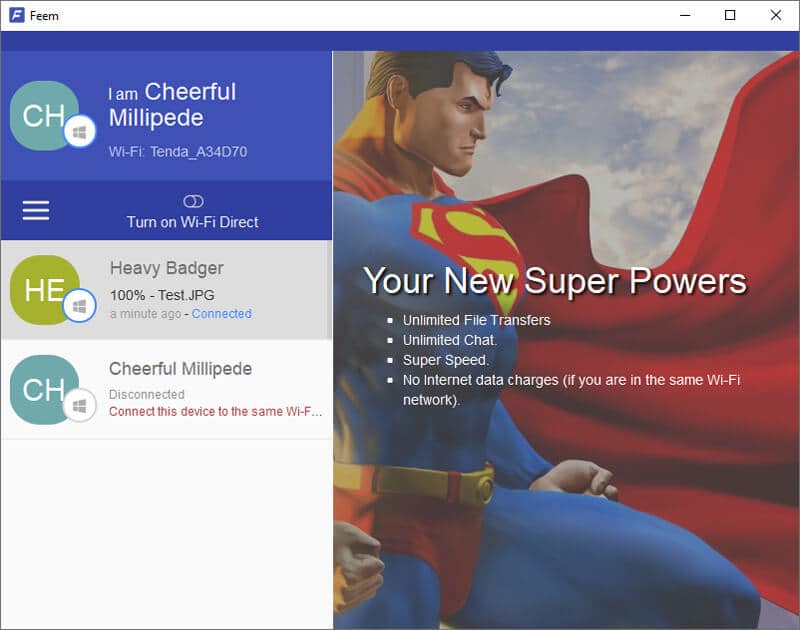
Another application that you can use to transfer files from one laptop to another wirelessly is Feem. It will work with most versions of Windows as well as Android and iOS mobile devices. So, if your laptops are both using Windows, you can use the Feem app to transfer files between them. You can download the Feem app for Windows here.
Feem uses encryption with file transfers which is great. There is a free version, but there are some limitations with file transfer. The application has ads which can also be annoying. It does have a Wi-Fi direct feature which is good though.
You will need to download and install Feem on both of the laptops. Both laptops need to be connected to the same Wi-Fi network for Feem to work. The Feem application will search for other laptops, and this can take some time. Once it finds the other laptop, you will need to select it for file transfer.
Feem is similar to SHAREit in that you can simply drag and drop files from one of the laptops into the interface for transferring to the other laptop.
5. Filedrop
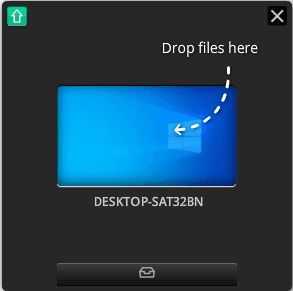
Another free application for wireless file transfer between two laptops is Filedrop. It is a very simple app that has an easy-to-use interface. At the time of writing, Filedrop was free to use for Windows and Mac OS laptops. You can download the Filedrop application here.
For Filedrop to work, you will need to connect both laptops to the same Wi-Fi network and download the applications on both machines. Then you need to open Filedrop on both laptops and then it will connect automatically. After that, it is just a simple matter of dragging and dropping the files you want to transfer.
6. AnySend
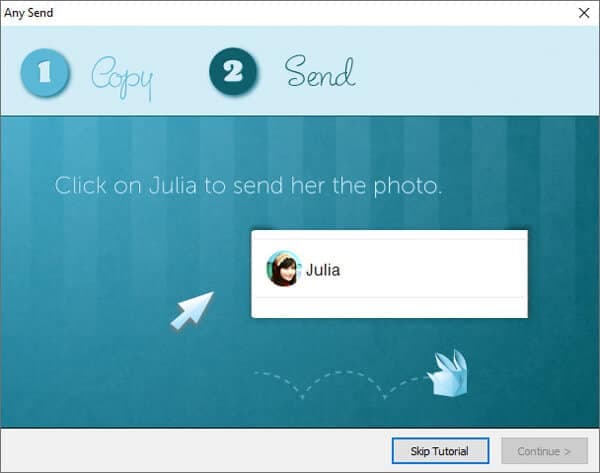
Finally, we will look at AnySend. This is another simple application that you can use to transfer files wirelessly between two laptops. AnySend is a simple app with a simple UI and is available for both Windows and Mac laptops. At the time of writing this guide, AnySend was free for Windows laptops, but there was a charge of $5 to use it on a Mac laptop.
You can download AnySend from here. The app will let you transfer files at a transfer speed between 2 and 10 MB per second depending on your Wi-Fi setup. To use the AnySend app to transfer files, both laptops must be on the same Wi-Fi network.
Download AnySend on both of the laptops and then open the application on the two machines. It works differently from the other apps in that you now need to copy the files or folders you want to transfer to your clipboard. Then select the target laptop in AnySend and the second laptop will receive a notification. Accept the file transfer on the second laptop.
Comparison Table
Here is a comparison of the different applications you can use to transfer files wirelessly between two Windows laptops:
ApplicationPlatformsPros****ConsNearby SharingWindows 10 version 1803 or higher onlyBuilt-in feature in Windows 10. Easy setupOnly works with Windows 10 laptopsSHAREitWindows 7,8 and 10Some good features and secureDoes not work with Mac laptopsFeemWindows 7,8 and 10 Encrypted file transfer and Wi-Fi direct featureAnnoying ads, limited file transfers and no Mac supportFiledropWindows 7,8 and 10 and MacSimple to use UINoneAnySendWindows 7,8 and 10 and MacSimple to use UISometimes there are connection problems
Conclusion
You have a number of different options when it comes to transferring files from one laptop to another wirelessly. Using your Wi-Fi network, you can make the transfers easily using one of the applications above. All of the solutions we discussed in this guide are free.

Tech enthusiast and founder of Technize. Passionate about making technology accessible and helping people make smarter buying decisions.