How to Use a Laptop as a Monitor? [Guide]
![How to Use a Laptop as a Monitor? [Guide]](/_next/image/?url=%2Fwp-content%2Fuploads%2FUse-laptop-as-a-monitor.jpg&w=3840&q=75&dpl=dpl_EksRoMJvJYYdtJYq4CzUENiyLG9y)
Disclosure: This post may contain affiliate links. If you purchase through these links, we may earn a small commission at no extra cost to you.
Have you ever wondered if you can use your laptop as a second monitor for your Windows or Mac desktop?
Well, the answer is that you can.
In this article, we will look at how you can use your laptop as a second monitor and what you need to do it.
You may have different reasons for needing a second monitor. One of these could be that you want to make your workspace larger to increase your productivity. On the other hand, you might just like the idea of having a multi-monitor setup, or if you are a gaming enthusiast, then this can be very helpful.
If you have a laptop and a desktop, then there is no need for you to go out and purchase another monitor. You can go multi-monitor with your laptop without the need for cables too, in some situations.
Many people multi-task these days, and it can be frustrating having to use the Alt + Tab function to switch between applications. However, with a second monitor provided by your laptop, you can have these applications ready for you on the second screen.
You need to bear in mind that it will be a one-way scenario when you use your laptop as a second monitor. The laptop will receive video signals from your desktop, and you won’t use it independently.
Windows Computers
Here we will be extending the display of a Windows desktop PC to a Windows laptop.
Wireless Display with Miracast
In this first method, you will use the Miracast software, standard with Window 8.1 and above. If you have Windows 7, you can get Miracast, but you need to check whether your computer will support it first.
Miracast and Windows 7
For a Windows 7 desktop computer, you need to perform a simple check to see if your hardware is compatible with running Miracast. Just open the Run window and enter cmd to open the command prompt window. Then you need to type in the following:
netsh wlan show drivers
Make sure you include the spaces and then hit Enter.
What you are looking for in the list is either:
Wireless Display Support: Yes or Wireless Display Support: No
If it is No, then you can’t use Miracast, sorry.
If you can run Miracast, then you can use it with the Intel wireless display technology WiDi. You will need to set up WiDi and then open it and connect to the software. Another method is to use a Miracast adapter which you can find online.
With an adapter, you may have to use a dongle on your laptop or use a wireless connection. Either way, you will have to add a device in Control Panel on your Windows 7 desktop. Using both of these methods, you should be able to extend your Windows 7 screen to your laptop.
Miracast and Windows 8.1/Windows 10
We are assuming here that both your desktop and laptop are using Windows 8.1 or higher. The first thing you need to do is to set up your laptop:
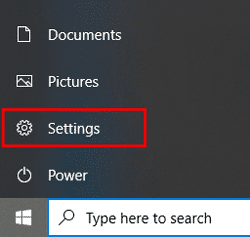
- From the Start menu, access your settings
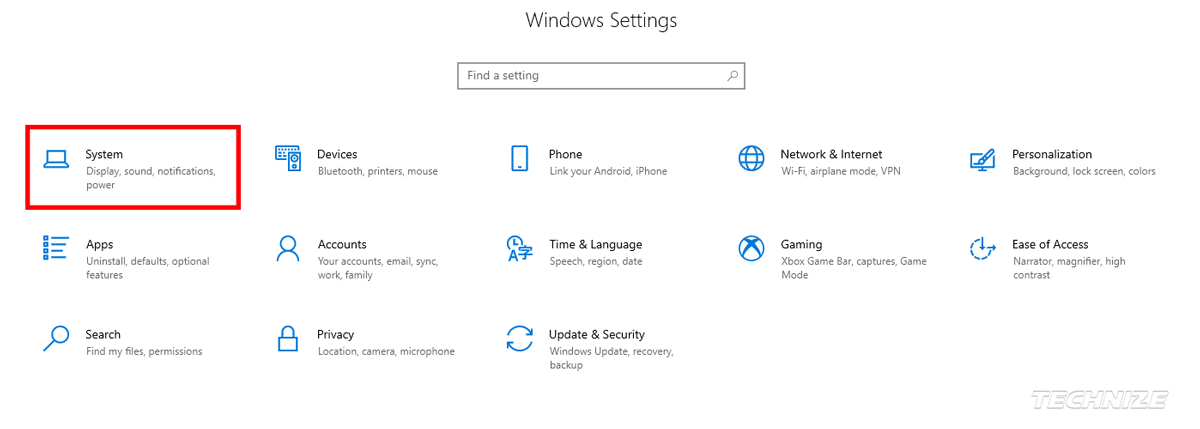
- Select the System icon
-
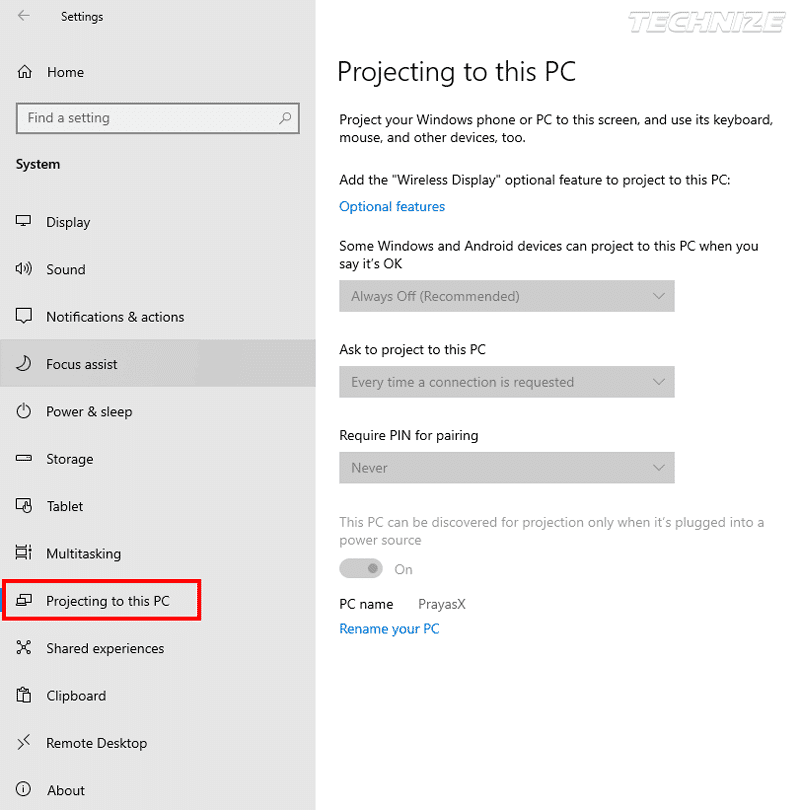
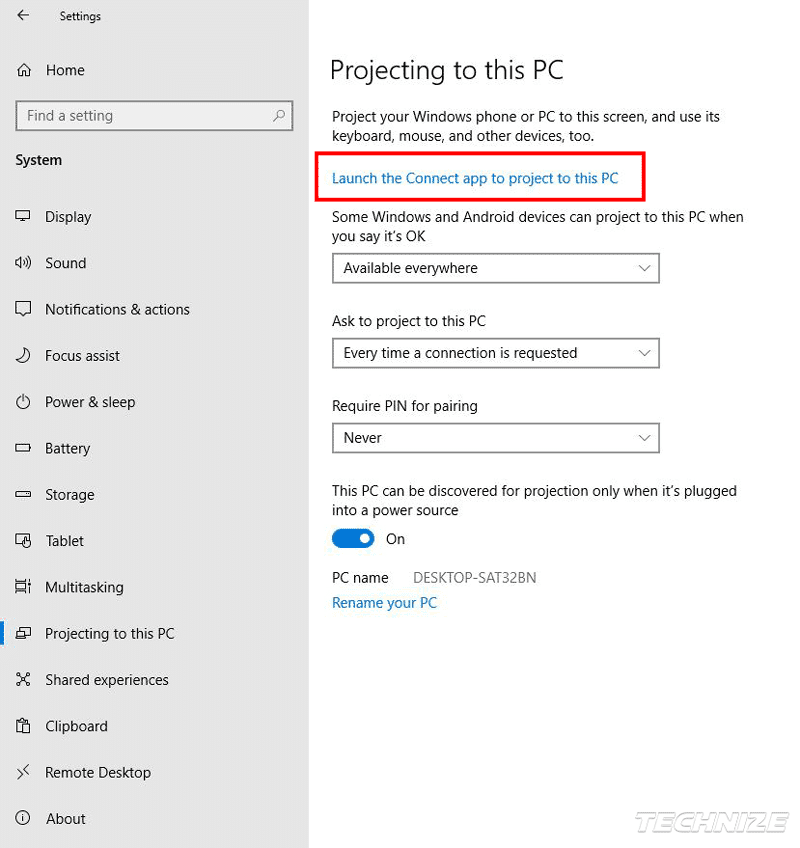
Choose the Projecting to this PC from the menu
-
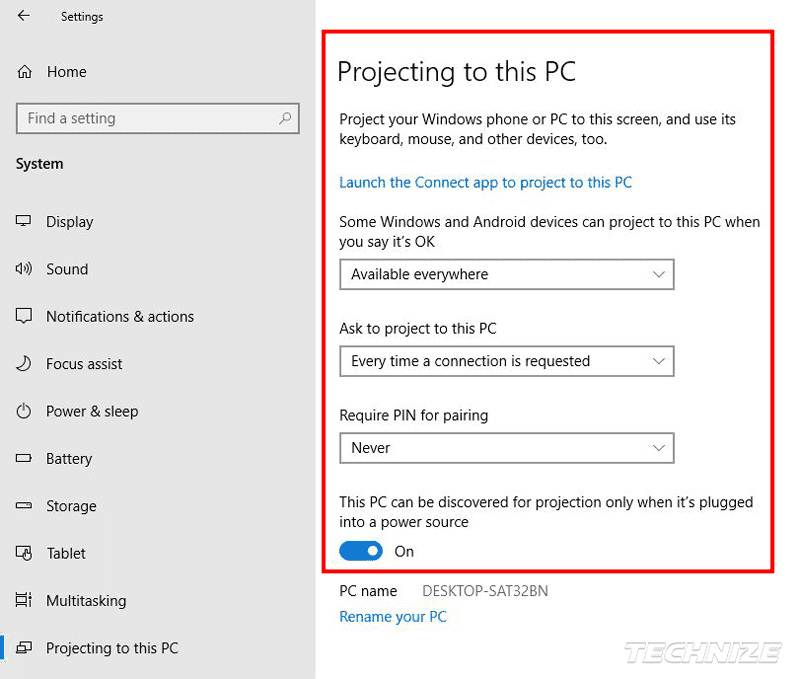
Use the first drop down and set your laptop as Available
-
Make any other settings changes that you want
-
Now your laptop is ready to receive the video signal from your desktop
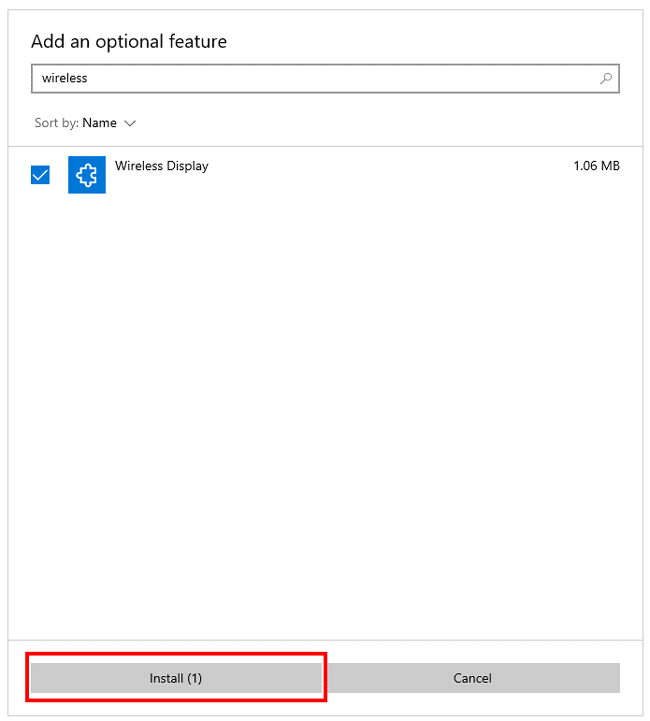
If you didn’t install the optional wireless display feature on your laptop, you should install it first by clicking the optional feature>add an optional feature and then type wireless display.
Now it is time to set up your desktop:
-
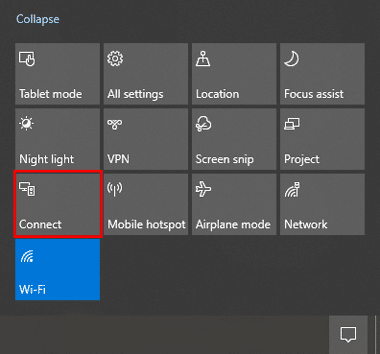
Locate the Notifications/Action icon on your taskbar and click on it
-
A slide-out menu appears, and you need to select Connect
- Now go over to your laptop and click Launch the Connect app to project to this PC, and the app window will be launched
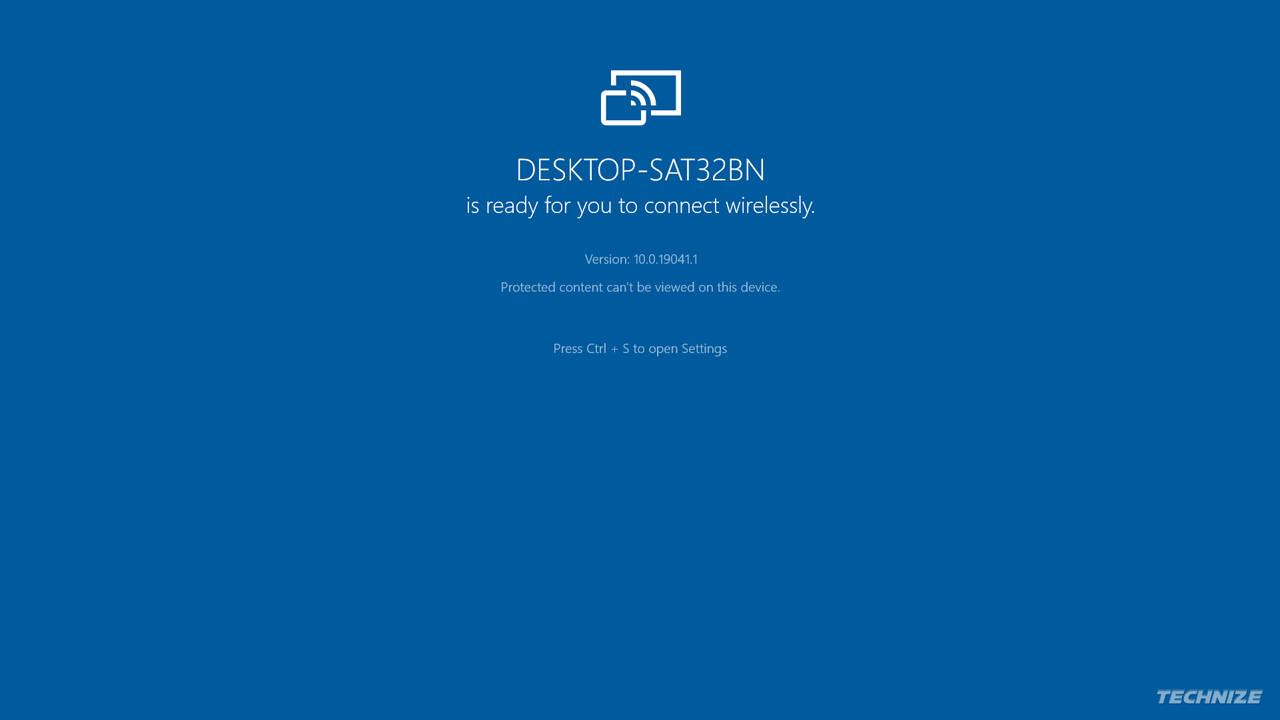
- You should see your laptop appear on your desktop and when it does, click on it
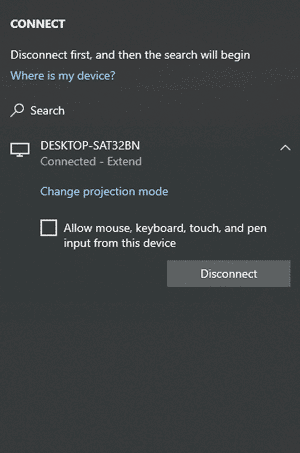
- Now go over to your laptop and choose to Accept, or it will be automatically connected.
Back on your desktop, bring up the Display Settings window
Go to Multiple Displays and select Extend desktop to this display
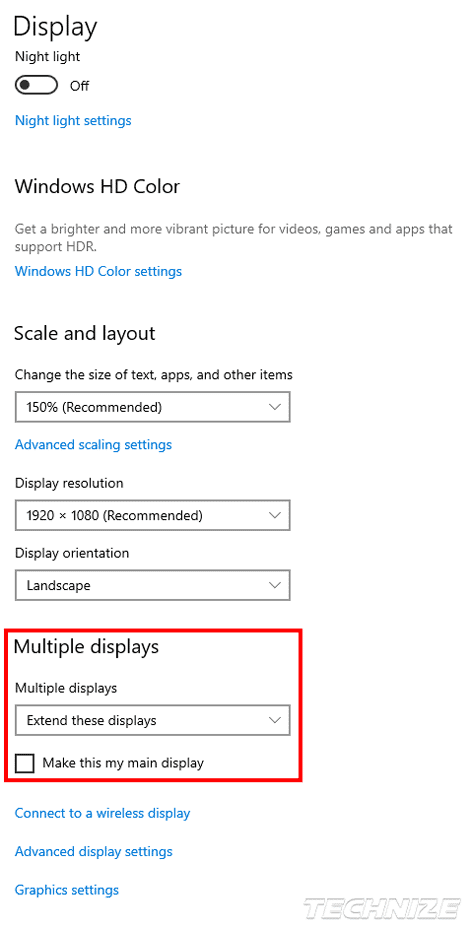
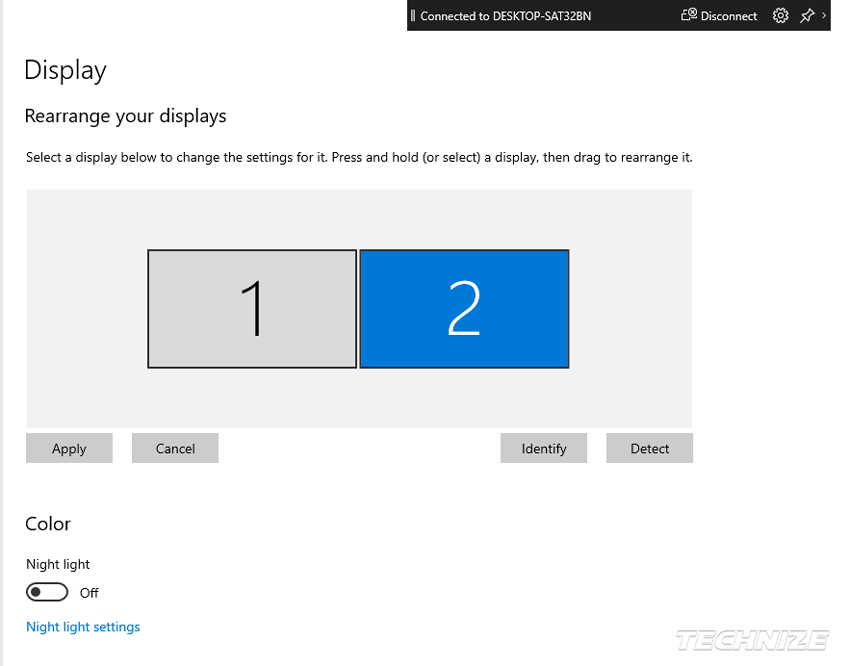
Now you can organize the two different monitors so that they display what you want
This all sounds great, doesn’t it?
But with all things computing, there is a possibility that you may encounter some Miracast compatibility problems. For a start, your desktop PC must have the ability to use WiFi and you may have to get a pci-e or USB wireless adapter to do this. There may be problems with graphics card compatibility too, so look out for this.
Laptop as a Second Monitor with Space Desk

If you want to avoid compatibility issue nightmares with Miracast, you can use the Space Desk third-party application. With Space Desk, there is software for your desktop and your laptop to install.
Once I installed Space Desk, I found it easy to set my laptop up as a second monitor. It was a lot easier than using Miracast, to be honest. In addition, you can use the software to create a second screen with a tablet device and even your smartphone.
Use Synergy for making your Laptop a Second Screen
Another good application is Synergy. With this application, there is an auto-configure function that works really well. It will cost you around $10 to use Synergy, and if you want the added security of using SSL encryption, you will have to pay around $30. But the application does work well, and the setup is hassle-free.
Laptop Monitor with InputDirector
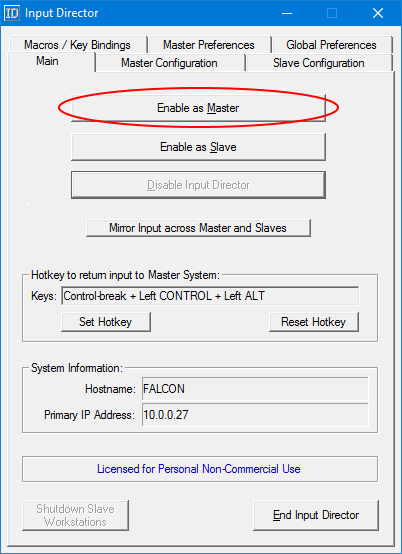
InputDirector works similarly to Synergy, but there is no auto-configuration capability. However, this doesn’t mean that you should dismiss it as an option because the setup is not that difficult, as all you need to do is configure your computers for master and slave correctly. Even better is that you can get this software free if it is just for personal use.
Mac Computers
Although I am not a great Mac user, I have found a way to extend a desktop screen to a laptop or any other iOS device. This requires the use of third-party software called Avatron’s AirDisplay. This software has been around for a few years and works well.
For the host computer, the software is free, but you will need to purchase the client software for your laptop. This will cost you around $20, but the application is so good it is worth it.
It gets better. There is also a client app for a Windows computer, so you are good to go if you have a Mac desktop and a Windows laptop. Again this is going to cost about $20, but it really is the easiest solution. The app supports Windows 7 or higher operating systems.
So you can use your Laptop as a Monitor
The bottom line is that you can use your laptop as a second screen rather than buy a second monitor. There are quite a few options for Windows users and a solid solution available for Mac users.
All of the methods here will work wirelessly, so there is no need for any cables. However, Miracast takes a bit of effort to set up, and if you don’t fancy that, then there are some good third-party solutions available. So get to it and use your laptop as a useful second screen to improve your productivity today.

Tech enthusiast and founder of Technize. Passionate about making technology accessible and helping people make smarter buying decisions.