How To Disable or Turn Off Microphone in Windows 10 Laptop
Disclosure: This post may contain affiliate links. If you purchase through these links, we may earn a small commission at no extra cost to you.
Most laptops have in-built microphones and webcams used for Voice over Internet Protocol (VOIP) calls or video conferences. However, many global users have raised concerns that hackers could access their computers and take over webcams and microphones.
In fact, the issue of web camera hacking has been on the headlines in the past few years. Consequently, people have begun to undertake safety measures like using tape to cover built-in laptop cameras or unplugging external cameras.
But what about microphones and the perceived threats associated with them? What precautions can you take against people trying to listen in on your conversations and record personal information?
Well, you’re in luck because we will show you how to disable your microphone and minimize your risk. Then, you can enable it as and when required.
Disabling Microphone in Windows 10 computer
There are quite a few ways to disable the microphone on a Windows 10 computer. Here is a simple guide on how to disable your microphone.
1. Using the Device Manager
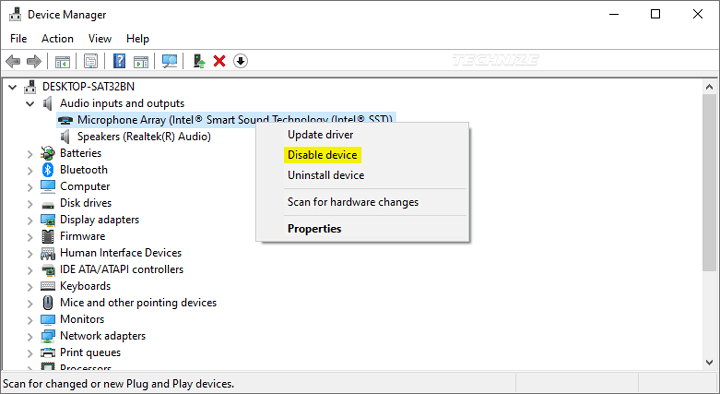
To disable the in-built microphone using the Device Manager on Windows 10, open the Device Manager by right-clicking on the Start Button.
Then, locate the Microphone in the Audio inputs and outputs section. Now right-click on the Microphone option and click on the Disable option.
A pop-up dialog box will appear on your screen. Click Yes and your microphone will be disabled. You can re-enable your microphone by following the same steps.
This method will also work on computers that are equipped with Windows 7 and 8.
2. Using Device Properties
The Device Properties can be accessed using two methods.
Under the first method, you must open the Start menu, then Settings, and System, and finally click on Sound.
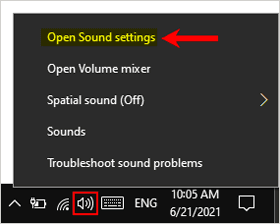
Or you can go to the System tray, locate the speaker icon and right-click on it. Then, you can select the Open Sound Settings.
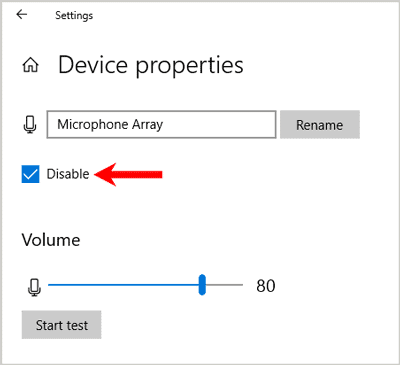
Whichever method you use, a dialog box will appear on your screen listing all the input devices. Now, you need to scroll down the list and select Device Properties of your microphone input.
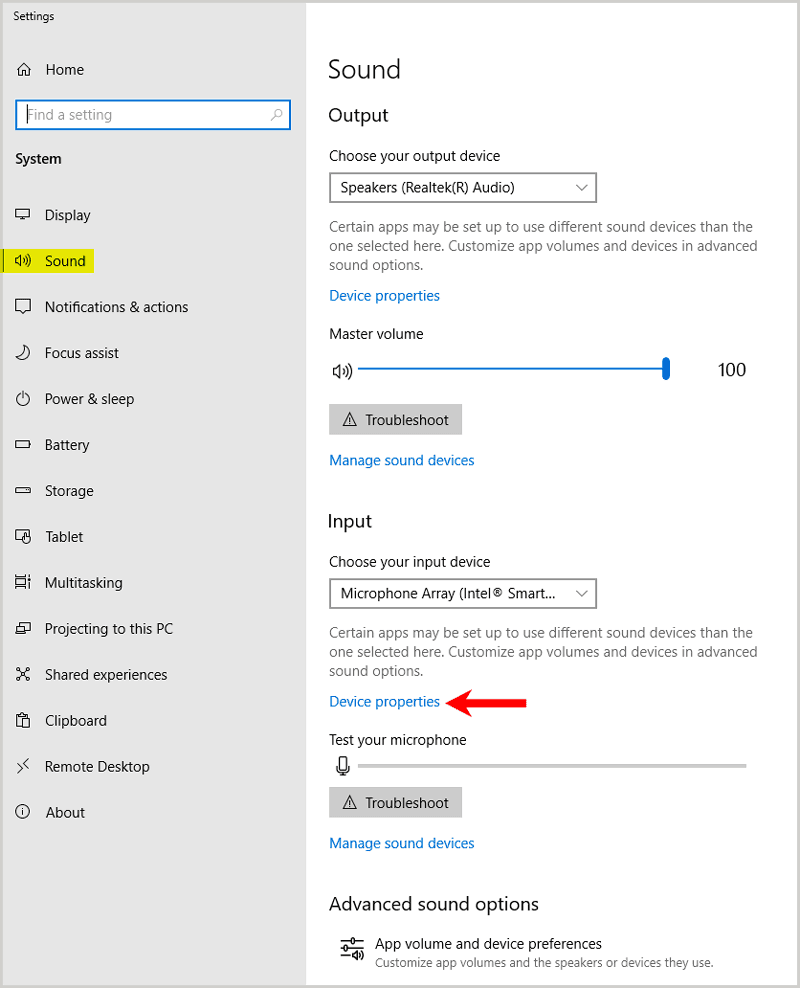
On the next screen, mark the Disable checkbox, and the microphone will stop functioning.
3. Using Additional Device Properties
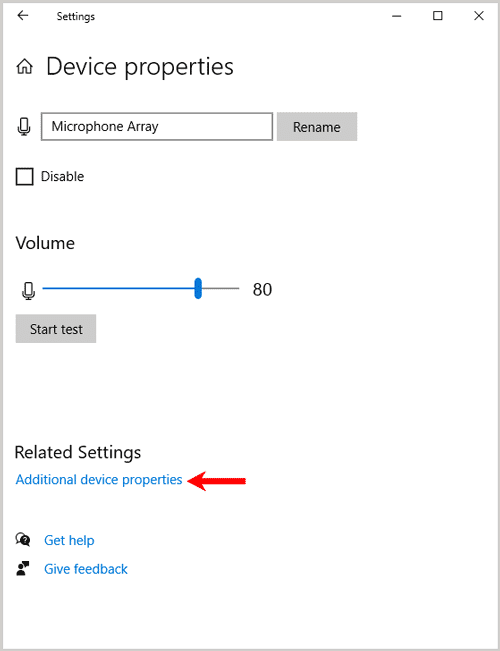
For this method, you will have to open the Device Properties using the previous method.
There you will find an Additional Device Properties option, which will open the Advanced microphone settings in the Control Panel.
The dialog box will contain four options—General, Listen, Levels, and Advanced.
In the General tab, you can disable or enable the microphone using the Device usage dropdown. The driver details will also be displayed in this tab.
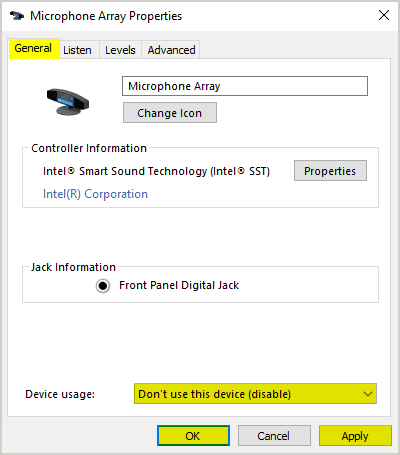
The Listen tab can be used to deny or allow access to the microphone jack. you can also use this tab to set your microphone’s power options.
You can use the Levels tab to mute the microphone and tune your microphone’s volume settings.
Lastly, the Advanced tab lets you control which devices can use the microphone. you can also use it for customizing the sampling rate.
4. Using Manage Sound Devices
The Manage Sound Devices setting lists all the audio output and input setups in your Windows 10 computer. These include the built-in microphone as well as Bluetooth devices and headphones.
Open the Device Properties page; find the Manage sound devices option and click on it. This action will open up a screen listing all output and input devices.
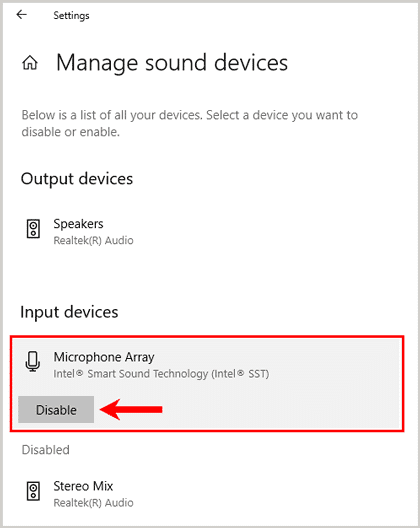
Now you need to scroll down the screen and find your microphone. Clicking on the microphone will display a button to enable or disable your microphone.
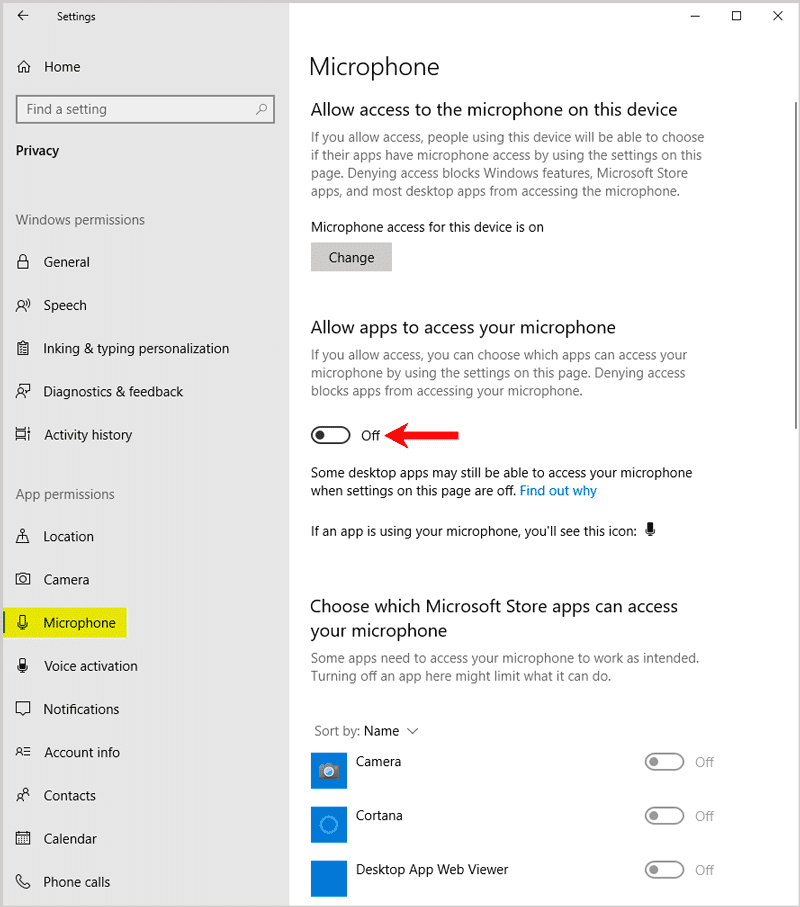
5. Using Privacy Settings
Another way to disable the microphone on your Windows 10 computer is through the Privacy settings. This setting also gives you control over which individual apps are granted access to the microphone.
For this method, you need to open the Settings and click on Privacy. A list will appear on the left side of the screen; find Microphone under App permission. Locate the Allow apps to access your microphone and turn it off or on for the apps that require access to the microphone.
Can I Turn Off Access to the Microphone on a Browser?
Every web browser requires permissions that allow access to your microphone and web camera. However, internet browsers also provide tools to block websites from accessing your microphone and camera.
This section of the article discusses how Chrome, Opera, and Firefox browsers enable you to set restrictions.
Chrome browser
Chrome has a privacy setting that prompts you to provide permission to every website that requests access to your camera or microphone. When this setting is activated, all you have to do is click a button on the pop-up message which will appear on your screen.
Here are the steps to activate the privacy setting:
- Click on the dotted menu on the upper-right side of your Chrome browser
- Select Settings
- At the bottom of the next screen, locate and click on Advanced
- Select Site Settings
- Select Microphone and click on the Ask before accessing button
- You can use the same method to restrict access to your computer’s web camera
Firefox browser
In addition, you can use the Privacy & Security setting in Firefox to set access restrictions for your microphone and camera.
To turn on this setting:
- Navigate to the top right corner of the browser and click on the three-lined button
- Select Options and click on Privacy & Security
- In the next screen, locate Permissions and choose Settings which appears next to the Microphone
- At the bottom of the screen, check the Block new requests asking to access your microphone box
Opera browser
Like the Chrome browser, Opera lets you block specific sites or makes it mandatory for them to seek permission to use the microphone or camera. You can enable this setting by using the Settings options of the browser.
Under settings, click on the Advanced section and select Privacy & Security.
Choose Site Settings from the options which will appear on the right side of your screen.
On the next screen, choose Microphone and enable the Ask before accessing option. You can repeat these steps to restrict access to your camera.
Conclusion
Disabling your microphone will prevent your computer from using it until you manually re-enable it. This option is beneficial if you have genuine concerns that someone could be using the microphone to invade your privacy.
If you have disabled your microphone, you can keep tabs on its usage through the notification icon on your taskbar. In case the microphone icon appears when you’re not using it on any apps, repeat the steps to disable it.
Windows is not equipped with a mute button for the built-in microphone, unlike external speakers. So you must open individual apps and mute your microphone.
Nevertheless, rest assured you will be safe from eavesdroppers if you follow the steps listed in this article. Just make sure you are extra vigilant about which apps and websites have access to your microphone.

Tech enthusiast and founder of Technize. Passionate about making technology accessible and helping people make smarter buying decisions.