Why Does My Laptop Turn On By Itself?

Disclosure: This post may contain affiliate links. If you purchase through these links, we may earn a small commission at no extra cost to you.
Many laptop users have reported their computers turning on by themselves after being shut down. Alarming, yes, but nothing to be worried about (no, you’re not in a horror story!). In a nutshell, it’s your laptop unexpectedly waking up after you have shut it down.
According to some folks, the problem is related to power control, but there are several reasons why a laptop can continue to turn on automatically. So, what I’m going to do is explore the various reasons for this issue and offer some solutions. Let’s dive right in!
What Turned The Laptop On?
Launch a command prompt that has admin privileges. To do that, type cmd in the taskbar search box. Right-click on the command prompt, click on Run as administrator.

After that, type powercfg –lastwake and press Enter to continue. You should see the last gadget, the one that turned on your laptop.
Then type powercfg –devicequery wake_armed. This will display a list of all gadgets that can turn on your laptop. The aim of running these directives is to figure out if the cause of the issue is hardware-based or not.

The Causes and Solutions
Some settings can cause your laptop to keep turning on. Therefore, disabling them might keep your laptop from turning on by itself.
1. Fast StartUp Mode
Windows 10 has fast Startup mode which prevents the system from shutting down as it should. What it does is, it keeps your laptop in something like a hibernation mode, so when you restart the laptop, the process will be faster. According to experts, this could be the culprit. The solution? Disable Startup mode. To do so, follow these steps:
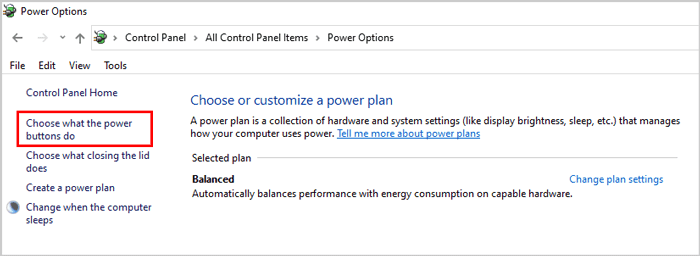
Step 1: In Windows 10, type Control Panel in the search box and select it, then click Power Options. Or click on the Power icon from the laptop’s taskbar’s notification area and Select More Power Options. This will bring up the Power Options dialog box.
 Windows 10 Power Options
Step 2: Locate the Choose what the Power buttons do option and click on it. Then, click on Change settings in the pop-up window.
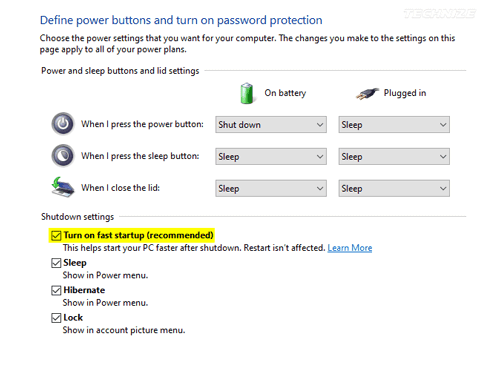
Step 3: You’ll see that the Turn on fast Startup (Recommended) checkbox under Shutdown settings is checked. Simply uncheck the option. Then, click on Save.
Step 4: Restart your laptop and see if the problem has been resolved.
2. Allow Wake Timers option
This is another feature that can cause your laptop to turn on of its own accord. Basically, we’re going to disable it, just like we did above with the fast Startup feature. Hopefully, this will fix the issue. Here are the steps:
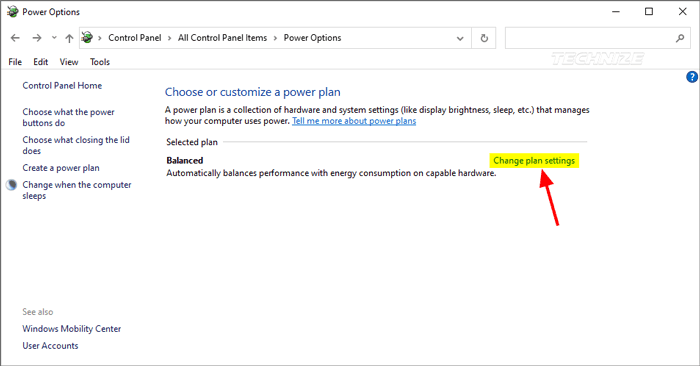
Step 1: Go to Control Panel, or type control panel in the search box and select it, then click on Power Options to proceed.
Step 2: Under the Choose or customize a plan heading, select Change plan settings in the Balanced (Recommended) segment of the pop-up window.
Step 3: Choose the Change advanced power settings option.
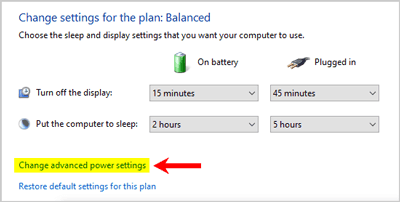
Step 4: From the popup window, double-click on Sleep and then on Allow Wake Timers.
Step 5: From the drop-down menu, choose Disable for both On battery and Plugged in.
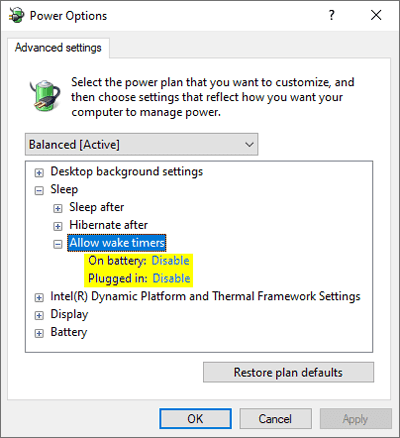
Step 6: When you’re done, press OK.
Step 7: Restart your laptop and see if the problem has been resolved.
If the Allow Wake Timers option is not available on your laptop, follow the steps below to enable this feature:
- Press Win + R to open Run.
- Type regedit, and then click OK.
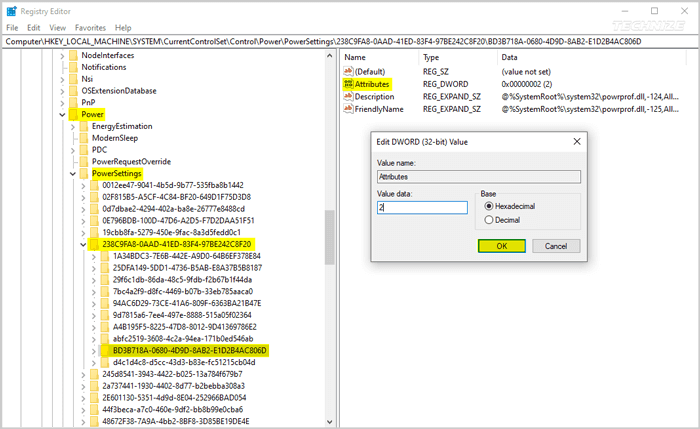
- Navigate to the following path: HKEY_LOCAL_MACHINE\SYSTEM\CurrentControlSet\Control\Power\PowerSettings
- Locate and select the following entry: 238C9FA8-0AAD-41ED-83F4-97BE242C8F20\BD3B718A-0680-4D9D-8AB2-E1D2B4AC806D
- Double-click on the entry Attributes, change it’s value data to 2, and click on OK.
3. The Automatic Restart Option
Sometimes, a laptop will experience a malfunction that will cause it to restart. This is part of its default programming. When your laptop is set to Standby, and this occurs, the laptop will reboot. If the error occurs again, the laptop will continue to turn on. Here’s what you need to do to fix this:
Step 1: Go to your Control Panel. Then, choose System from the popup window.
Step 2: Click on the Advanced system settings option located on the left side of the screen.
Step 3: Navigate to the Advanced tab. A popup window will appear with a Startup and Recovery section. Beneath this, there is a Settings button. Click on it.

Step 4: Under the System failure section you will see that the Automatically Restart option is checked. Uncheck the option.
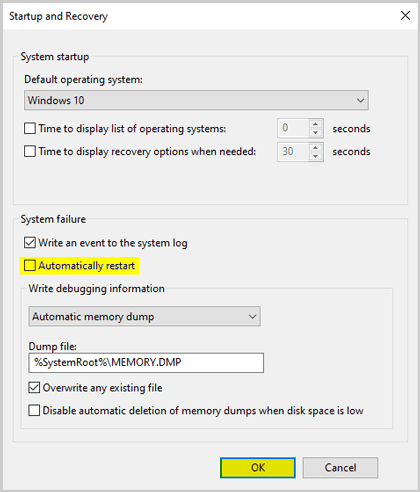
Step 5: Click on OK to save the changes.
Step 6: Restart your laptop and see if the problem has been resolved.
4. Automatic maintenance
This mode can also be responsible for waking up your laptop as it is usually configured to operate when it is idle. You may either adjust the timetable of the activities or disable any configurations to prevent them from turning on your laptop. Here are the steps:
Step 1: Go to Control Panel, or type control panel in the search box and select it.
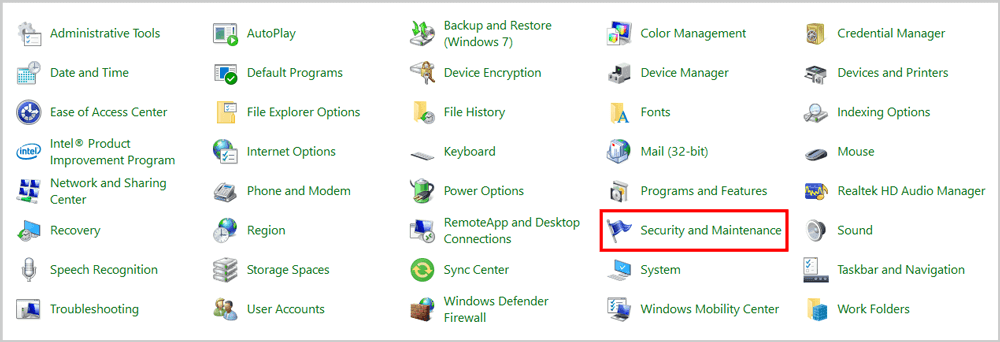
Step 2: From the popup, choose Security and Maintenance.
Step 3: Click on Maintenance and choose Change maintenance settings.
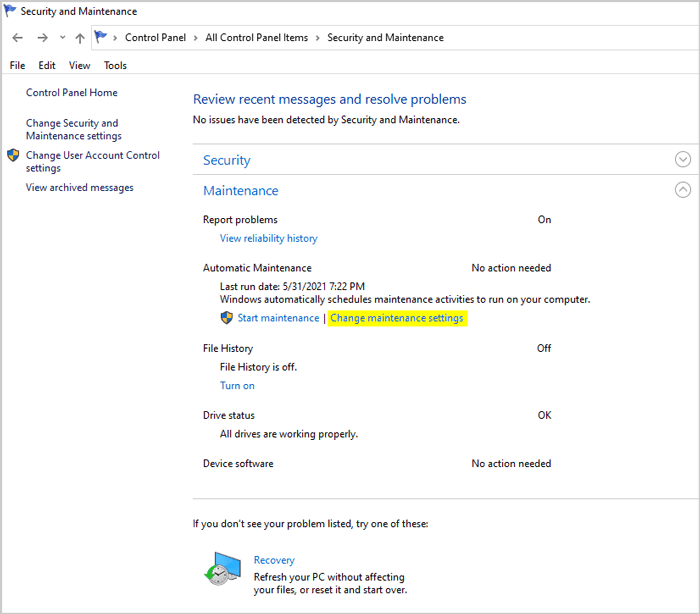
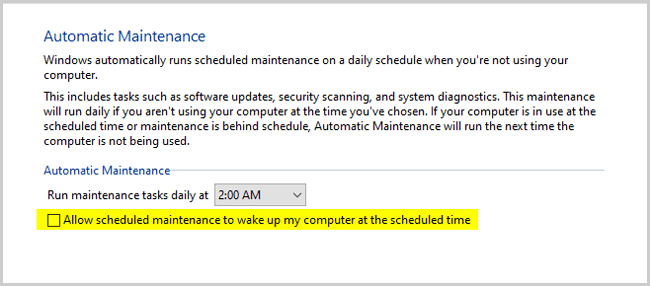
Step 4: You will see that the option Allow scheduled maintenance to wake up my computer at the scheduled time. If it is checked, then uncheck it.
Step 5: Click OK to save the changes.
Step 6: Restart your laptop and see if the problem has been resolved.
5. Scheduled Windows Updates
Routine upgrades, which are programmed to startup your device to perform the scheduled updates, have been known to wake up laptops. So, as we did before, we’re going to disable this function as follows:
Step 1: Click on the Windows key and R key at the same time to access the Run dialog.
Step 2: Type gpedit.msc in the blank box and click on OK or Enter to proceed.
Step 3: Navigate to the Windows Update folder in the Local Group Policy Editor browser as follows: Computer Configuration > Administrative Templates > Windows Components > Windows Updates.
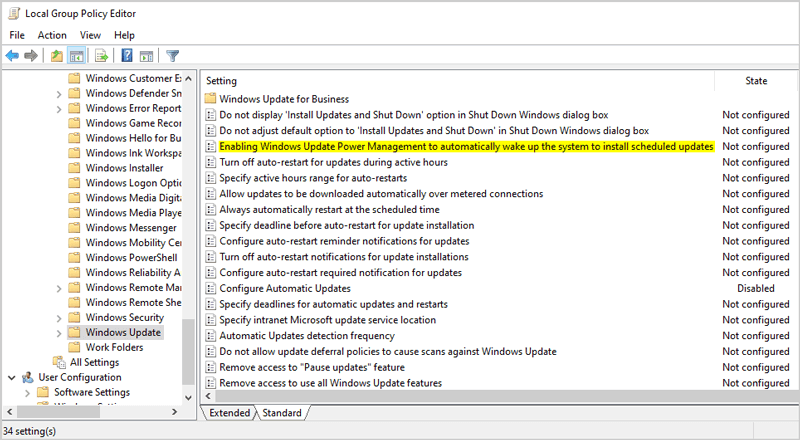
Step 4: In the right pane, please double-click Enabling Windows Update Power Management to automatically wake up the system to install scheduled update.
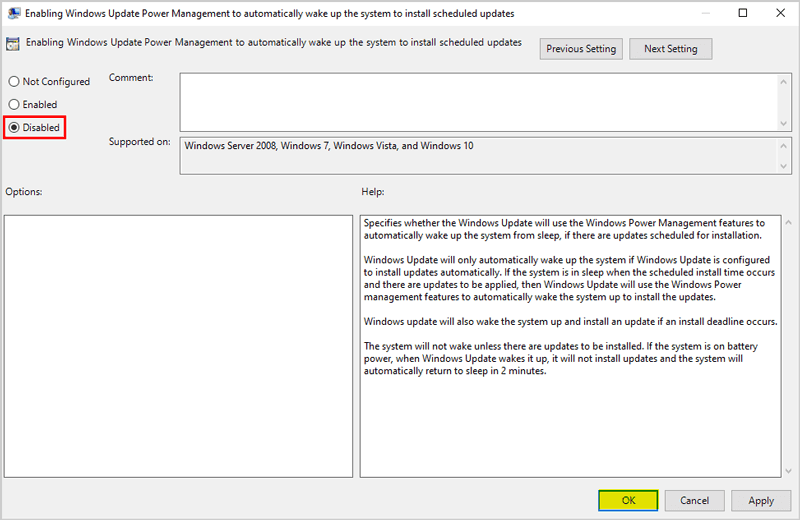
Step 5: In the pop-up window, click the Disabled option and click Apply and OK to save the change.
Step 6: Restart your laptop and see if the problem has been resolved.
6. Keyboard and Mouse
The built-in or external keyboard and mouse are two of the most famous culprits of this issue with laptops. How does it happen? Well, a slight tap could cause your machine to turn on. You can avoid this by accessing your laptop’s power management feature and changing the settings as follows:
Step 1: Launch the Device Manager (Win+X, then M). In the popup window, you should see a list of all your laptop’s hardware.
Step 2: Choose either the keyboard or the mouse. Right-click and select Properties > Power Management.

Step 3: Uncheck the option labeled Allow this device to wake the computer.
Step 4: Restart your laptop and see if the problem has been resolved.
(Note that, if you’re using additional gaming devices, you have to disable their power options as well.)
7. Wake on LAN
This function is useful when a laptop needs to connect with or transfer files or data to a computer on the network. However, it can also cause your laptop to turn on by itself. (This might be due to a feature built into its hardware, such as a network adapter.) To keep this from happening, follow these steps:
Step 1: Launch the Device Manager (Win+X, then M).
Step 2: Locate the Network adapters section.
Step 3: Right-click and then proceed to Properties > Power management.
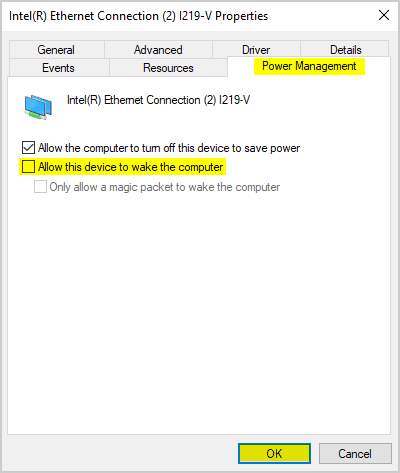
Step 4: Uncheck the box next to Allow this device to wake up the computer. Now, no other device on the network will turn on your laptop. (Note: Make no changes to anything that reads Miniport).
Step 5: Once you’re done, restart your laptop and see if the problem has been resolved.
8. Troubleshooting
Sometimes figuring out why your laptop is turning on by itself can be as simple as troubleshooting. Here’s how you do that:
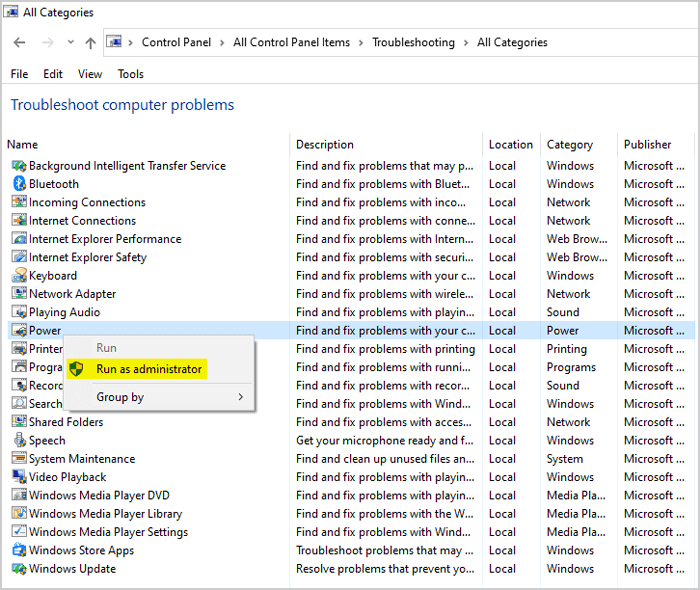
Step 1: Go to the Control panel. Then, choose Troubleshooting from the popup menu.
Step 2: From the left menu, choose View all.
Step 3: Scroll to the bottom to Power, right-click it, and select Run as administrator. Follow the steps provided in the troubleshooter.
Step 4: Once you’re done, restart your laptop and see if the problem has been resolved.
A Few Last Words
I hope you now have an idea of what can cause this rather odd behavior from your laptop. It might not seem like a big deal, but it can be if you find your laptop’s battery drained because it has been running for hours unnecessarily. In any case, try the solutions offered, hopefully one or some of them will work for you.

Tech enthusiast and founder of Technize. Passionate about making technology accessible and helping people make smarter buying decisions.